This post supplements my earlier
post on this topic. That tested fairly recent desktop class hardware when using a CF memory module on a SATA bridge adapter as the primary storage/boot media. In this test, I perform a very similar test, but using a common laptop (Dell D610) to boot Slackware on flash memory on a USB 2.0 interface (aka, "jump drive," "thumb drive," etc.)
This test confirmed the concept of having a "system in your pocket" is now a reality. Note: This is a full install; the current generation of flash storage gives more than enough space to comfortably hold the full set of standard software, with no cutdowns or compromises required. R/W cycle lifetime of the hardware has also improved, but YMMV. I started this test with a 16G capacity flash drive, but more testing showed that an 8G capacity drive could be substituted in a pinch.
Update: 2010-12-28I added this
post to document a few of the tricks that make this possible using the smaller flash drive.
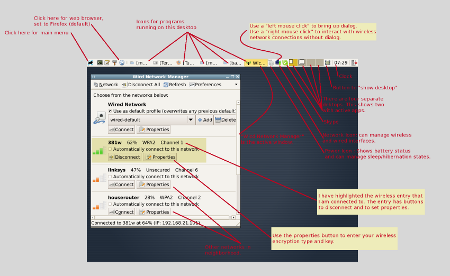
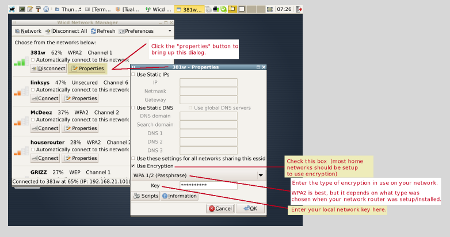
More later. For now, here are a couple of screenshots.
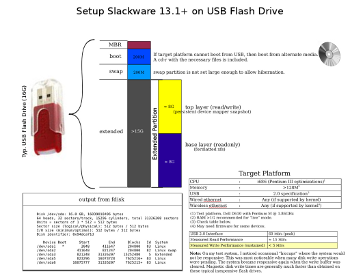 1.
1.This mode of operation places the "top" layer of the persistent snapshot on its own partition on the flash drive. An alternate mode uses RAM as the top layer. When the "top" layer is allocated from RAM, the snapshot is not really persistent, but it has the advantage of not incurring R/W delays associated with flash media, and it will not use
finite R/W cycles associated with the media itself. Because the snapshot is generalized, there are other modes of operation which can be setup with minimal extra effort. Here are some options off the top of my head:
top layer encrypted
top layer stored on other device on other filesystem (for example, NTFS)
top layer on RAID 1
etc.
Of course, using a device mapper snapshot is completely optional. The current size of flash memory devices allows a "normal" install without too many tricks required. In that mode, an 8G flash device would work fine, allocating about 4G for system software and 4G as free user space. The only tricks are building the initrd with the required modules to get USB functional and setting up the bootloader. I am using my own "startup environment" which is a bit different than the standard Slackware initrd.
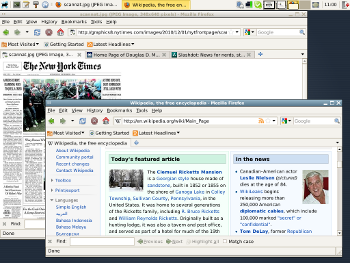 2.
2.Installed software includes:
Slackware-current (2010-11-29) -- post v13.1
Linux kernel 2.6.35.9
XFCE window manager
Firefox
Open Office 3.2.1
Skype
Gimp
grub bootloader
and, of course, it is possible to install more software, per standard tools
The latest X window system should also "just work" and not require tweaking /etc/X11/xorg.conf to enable startup. YMMV.
Update: 2010-12-04Here is a package of files with some misc. information including statistics when running in live mode on a Dell D620 laptop. There is also a list of installed packages.
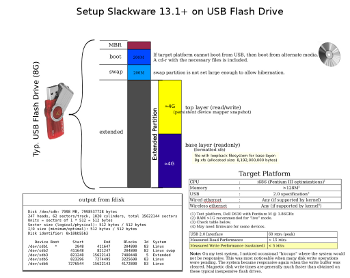
Update: 2010-12-14Some more testing showed that both of the possible startup modes (live or persistent) will work on a single flash drive as small as 8G. One trick is to use a "sparse" file to hold the base install image. Specifically, an 8G XFS filesystem image can be stored on a 4G partition. This works because the 8G image is only about half full. This frees up the other half of the device for changes. This may not be quite as flexible as the 16G device because the amount of changes that can be made to the base device does not perfectly match the underlying base filesystem. However, 8G may provide enough space to make it a viable option; that is, at least until 16G devices are commonplace. Be aware that when using this mode, the user should keep an eye on the remaining space available in the snapshot because it could be exhausted first, i.e. the snapshot is exhausted even though there is extra space on the filesystem. This problem is avoided when using the 16G size.
Update: 2010-12-15You should keep an eye on the space used in the snapshot image, especially when the snapshot is smaller than the target device. Here is a nice little hack:
#!/bin/bash
[ ! -e /dev/mapper/top ] && exit 1
v=$(echo "scale=4;$(dmsetup status top| cut -f4 -d\ )*100"| bc -l)
printf "Snapshot Used: %04.2f%%\n" $v
Update: 2010-12-16 Startup Notes
Goal: Boot to runlevel 3 in "live" mode
Steps:
(1) Select appropriate choice from boot menu
This will load the kernel and initrd. I have noticed this takes a variable amount of time depending on the hardware, and possibly the mode that the BIOS uses to interface with USB. I have seen this step take between 5 and 20 seconds.
(2) When the above step completes the kernel takes over and the login prompt should appear in less than a minute.
Start time is somewhat dependent on specific hardware. On my hardware I observed a time of 48 seconds. The specific boot details are as follows. First, there will be a slight pause while the kernel unpacks the initrd. There is a prompt asking the user to select which display mode to use. Second, the familiar "penguin" logo will be displayed as other startup facts scroll by as the kernel performs basic initializations. Third, control will transfer to my startup environment. It probably won't be obvious when the switch takes place, but it will include a step to load the kernel USB modules and include a 7 second delay while the USB bus stabilizes. Next, a reference to the license terms is displayed and asks the user to press "enter" to indicate acceptance (or ctl-alt-del to terminate). Upon acceptance, final setup of the snapshot in the desired mode is performed. When complete, control transfers to Slackware's default init program on the target root filesystem. The initialization requires certain keys/certificates to be generated and a "graphic" fingerprint is displayed for each. Finally, the login prompt will appear.
(3) In live mode, login as root and perform final initializations.
The user should set the root password and run "pkgtool" and choose, "Setup: Choose the Slackware installation scripts to run again."
When complete, add your non-root user. There are a few steps to perform here to make the user a "power" user. Add your name(s) to the appropriate groups, and possibly sudoers.
You can install other packages. Skype is included as a Slackware package in the root directory. Install it with the command:
$ installpkg skype-2.1.0.81-i486-1_SBo.tgz
The above steps can be a bit tedious, and can be avoided by using the "persistent" mode.
(4) Login as your non-root user and start a graphic session.
$ startx
From here, you are running GNU/Linux. You can install more software. For example, download and install the latest Adobe flash plugin for Linux.
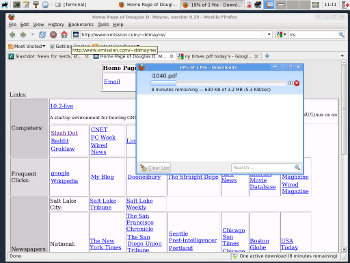
Update: 2010-12-20I performed a test where I booted on hardware at the lowest end of the possibly usable spectrum, i.e. when using at least a computer with a
P6 class CPU. I documented my test separately
here because this post is getting a bit cluttered.
 1.
1. .
. .
.
 headline.
 .
. 1.
1. 2.
2. .
. .
. .
. headline
 here
here .
. .
. .
. .
. Here
Here Dell D620.
 .
. .
. .
. .
. .
. .
. .
. headline.
 that page. Note: this was a followup to story which appeared in National Geographic,
  .
. headline
 headline.
 headline.
 headline.
 headline.
 graphic.
 comic
comic here
here